Manage Library User Access#
Access to a library team starts from the library home page in Studio and is managed in the library team manager in the Administrative Console. This article explains the library roles and how to add and manage members of a library team.
Any change made in the library team manager applies to this library only. It does not change what that user can do in other libraries or in courses.
Library Roles#
Libraries use roles to control what each team member can do. See Roles for more detail on the following library roles:
Library User
Library Contributor
Library Author
Library Admin
Library Team Management#
On the Team Management panel, there are three tabs at the top of the page:
Team Members
Roles
Permissions
Any user who has any of the above Library Roles can view these tabs.
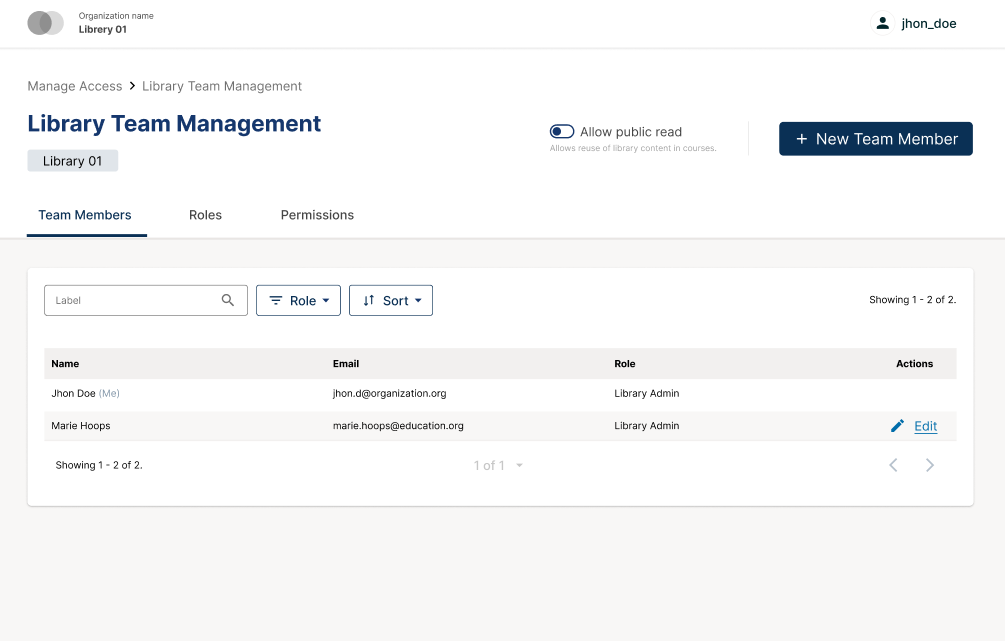
Team Members Tab#
On the Team Members tab, users can see who has access to the Library and which roles they have. The list of team members is searchable by username or email, and can be filtered by role, making it easy to understand who else can edit, publish or manage access.
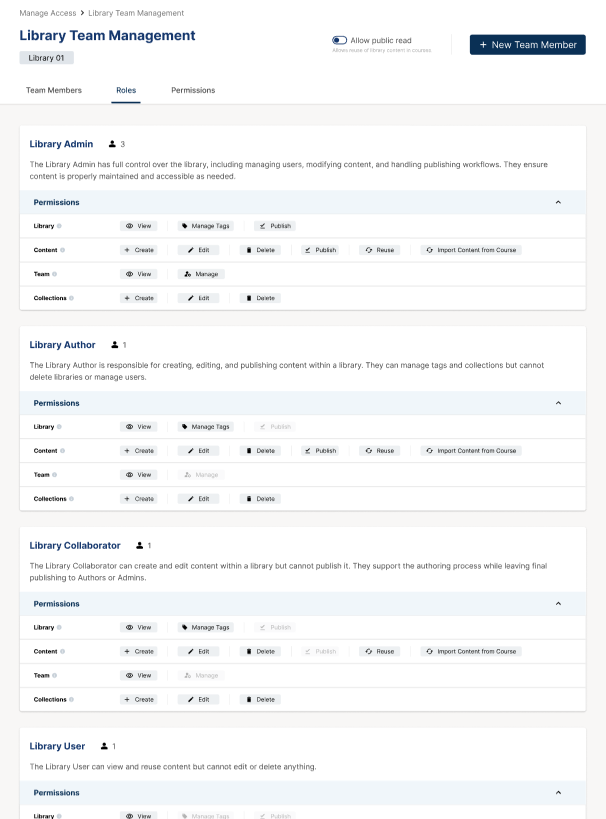
Roles Tab#
The Roles tab has a description of each Library role and the set of permissions each role includes, helping users understand at a glance what each role covers when granting permissions.
Permissions Tab#
The Permissions tab has a Roles and Permissions Summary Table that describes which permissions are assigned to each role. Every permission in the table includes a short explanation, enabling users to see what role allows which actions, and compare roles side by side before they change a user’s access.

Manage Access for Library Team Members#
Only Library Admins and global site admins can add or remove team members or change their roles. All actions in this section affect access to one library only.
To begin, follow these steps to open the Team Management panel:
From the home page of the library in Studio, click the ⓘ Library Info button on the top right of the page to open the right sidebar.

In the right sidebar, click the Manage Access button. This opens the team management panel in a new browser tab in the Administrative Console, on the Team Members tab.

View Team Members#
Library administrators can audit a user’s access to that library via the Team Management panel:
Use search or filters to find a user to update and select Edit in the Action column to open the user detail view.
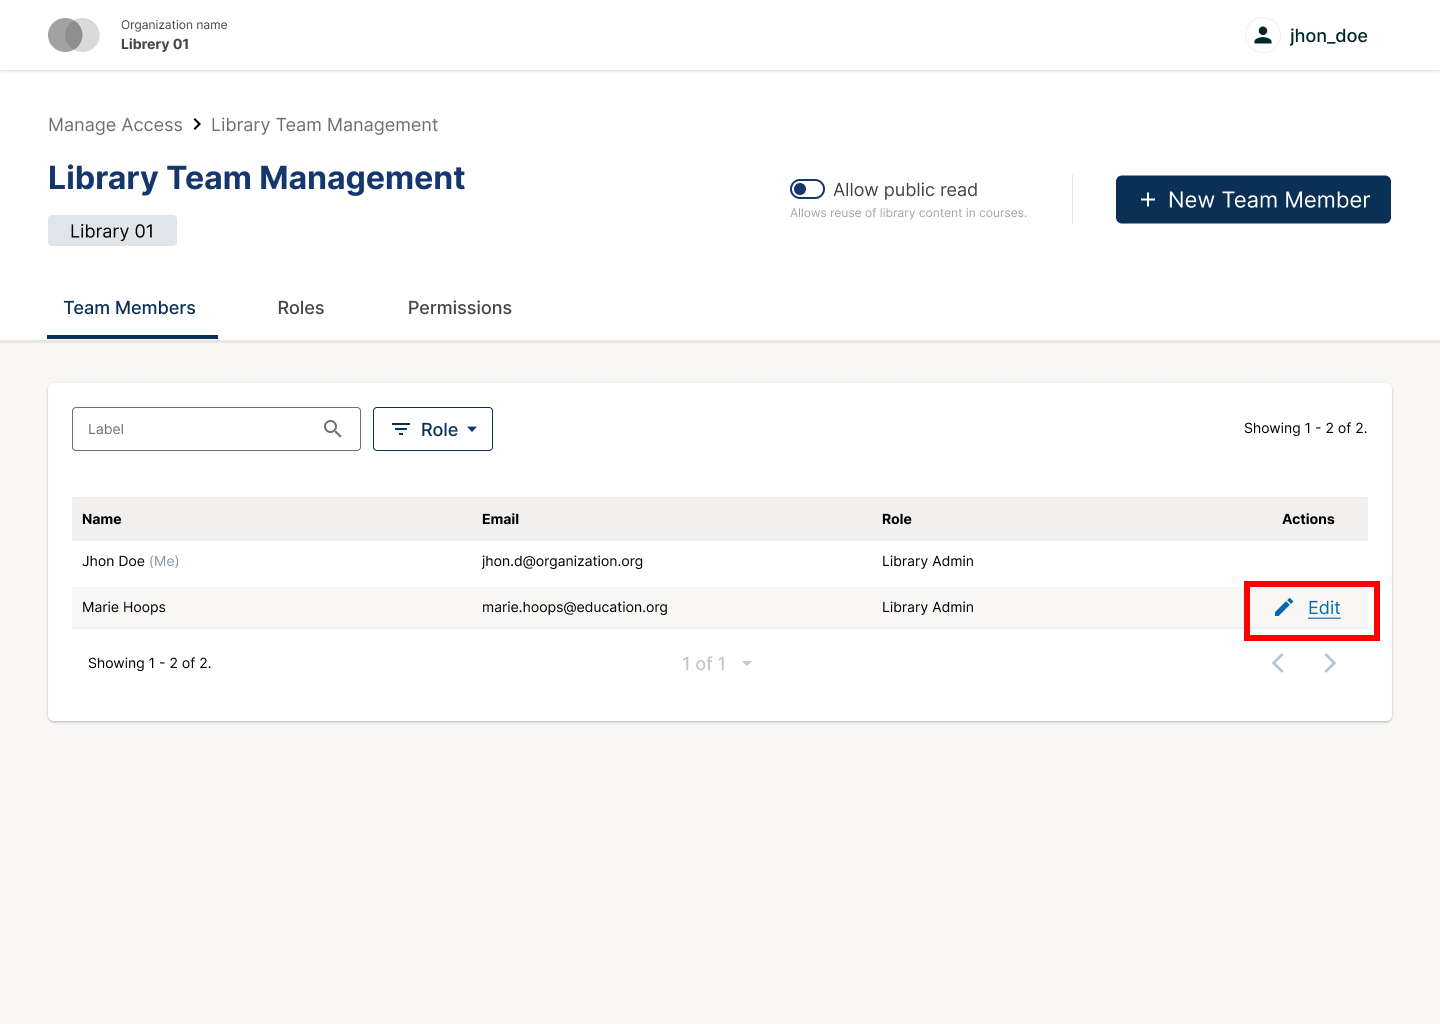
Once “Edit” has been clicked, a new screen is shown that allows admins to view what roles a user holds and edit their access to the library.
Add a New Team Member#
Library administrators can add a new team member via the Team Management panel:
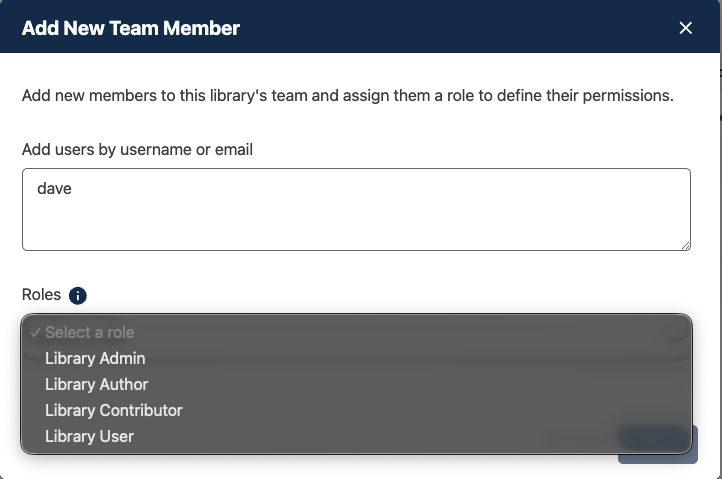
In the team management panel, click the + Add New Team Member button in the upper right corner to open the Add User pop-up.

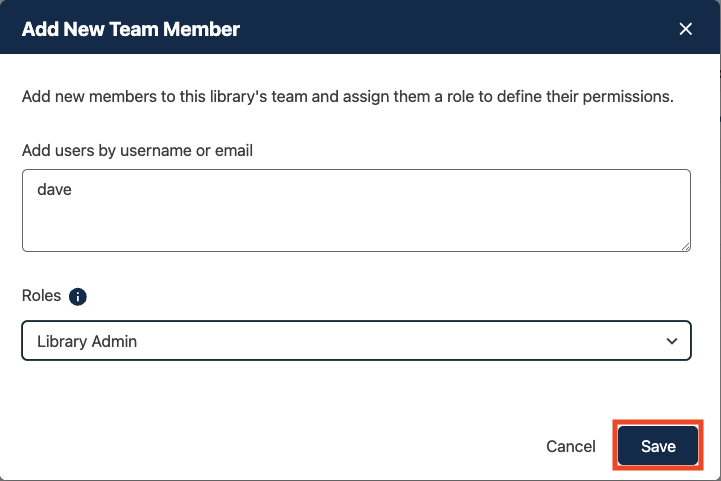
In the pop-up window, enter one or more email addresses or usernames of the people you want to grant access to, separated by commas. Select the desired role to assign, for example Library Admin, Library Author, Library Contributor, or Library User.
Save the changes. After saving, the new user(s) are listed in the team table with their new role.
Edit User Roles#
Library Admins and global site admins can update roles for users who are already on the library team. To begin, follow these steps to open the Team Management panel:
From the home page of the library in Studio, click the ⓘ Library Info button on the top right of the page to open the right sidebar.
In the right sidebar, click the Manage Access button. This opens the team management panel in a new browser tab in the Administrative Console, on the Team Members tab.
Add a Role to a Team Member#
Navigate to the “Team Members” tab of the Team Management panel. Use search or filters to find the user to update and select “Edit” in the Action column to open the user detail view for the user.
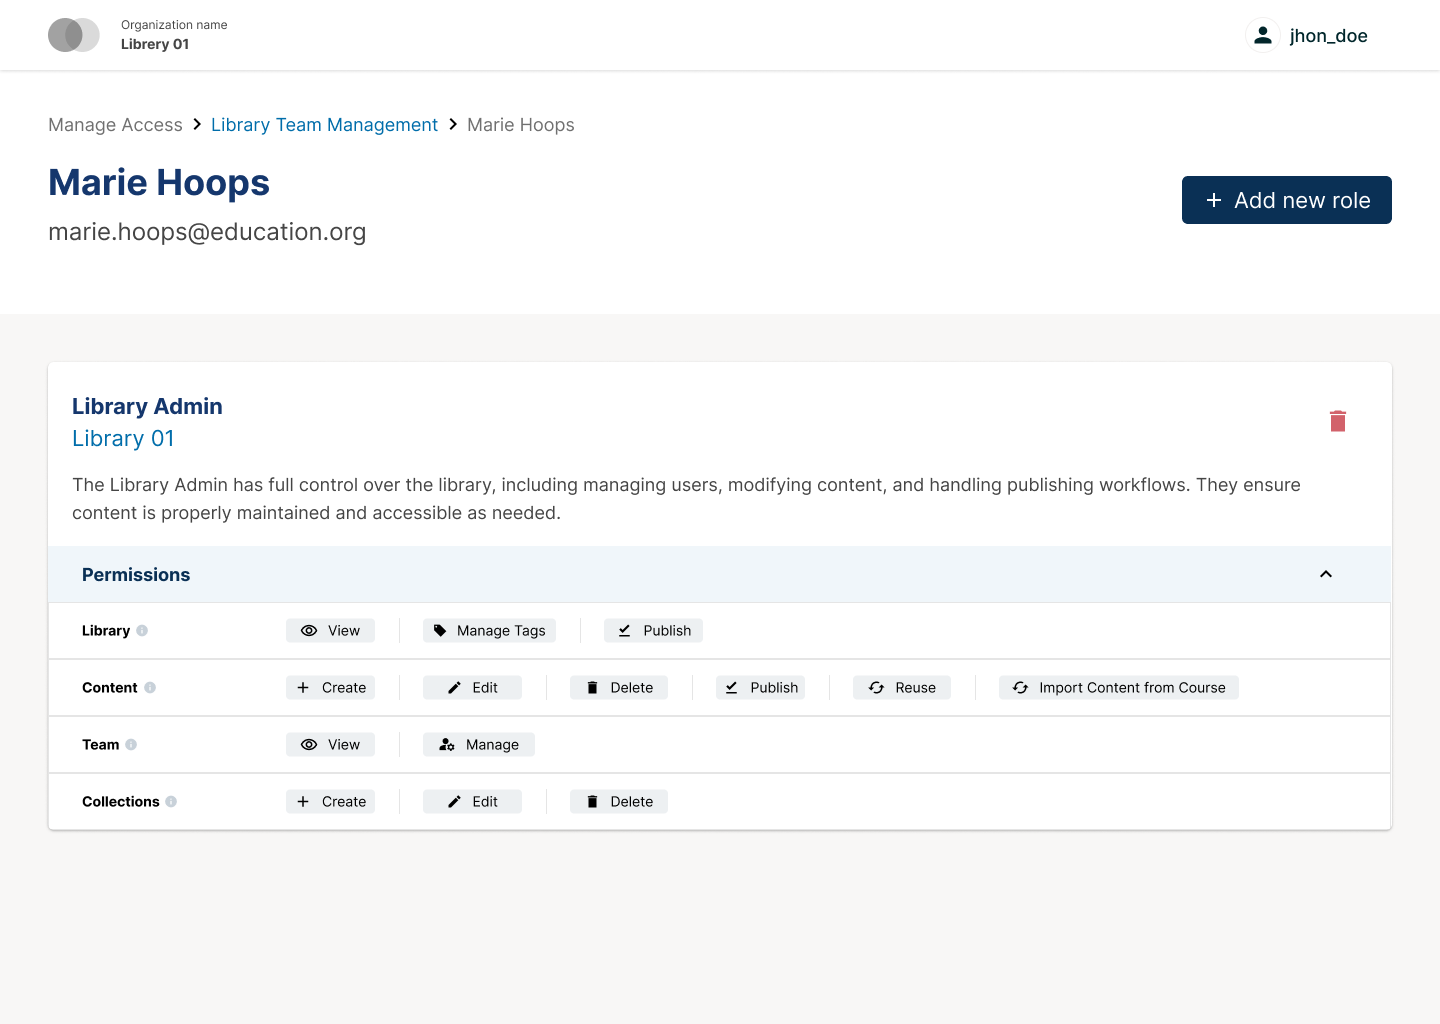
In the user detail view, select Add New Role in the upper right corner.

In the Add New Role pop-up, open the Roles dropdown and select the new role to add.
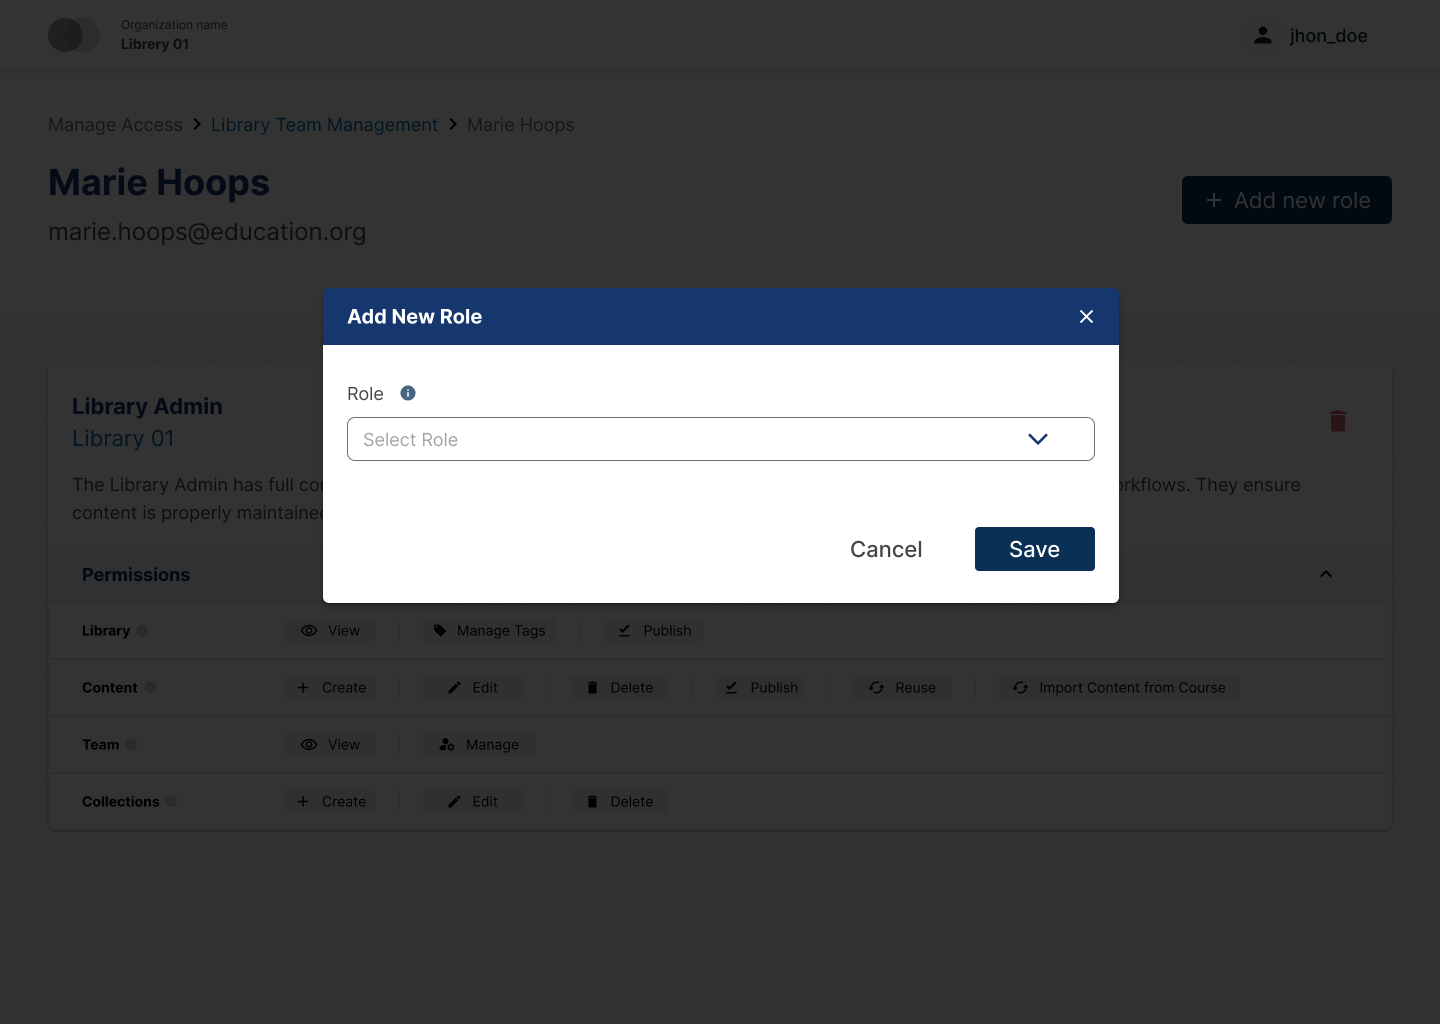
Select Save.
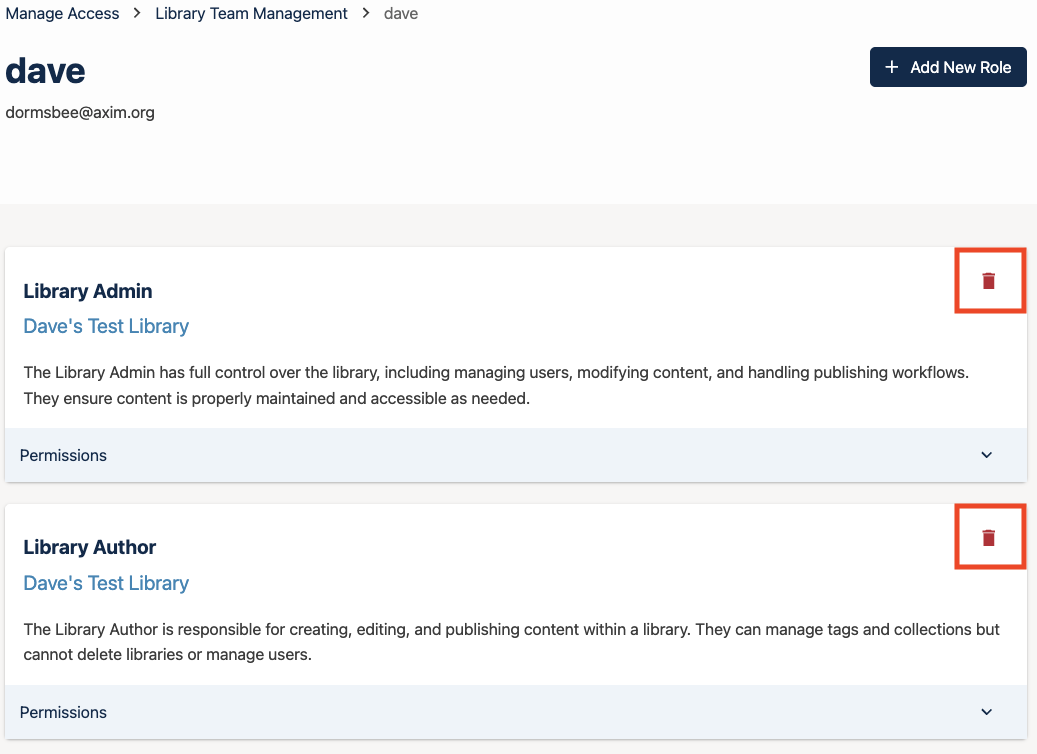
The new role is added for this user in this library and appears in their list of roles.
Remove a Role from a Team Member#
Navigate to the “Team Members” tab of the Team Management panel. Use search or filters to find the user to update and select “Edit” in the Action column to open the user detail view for the user.
In the user detail view, find the role to remove and select the delete icon for that role.
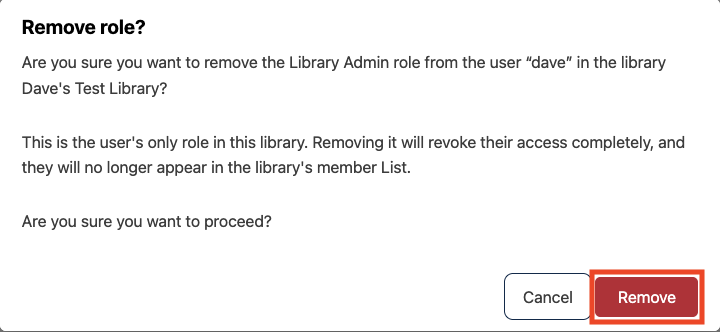
In the Remove role confirmation pop-up, review the message and select Remove to confirm, or Cancel to retain the user’s current level of access.
Note
After “Remove” is selected, that role is removed for this user in this library. If the user has no roles left for this library, they will no longer have access and will stop appearing in the team list. Their roles in other libraries or courses are not affected.
See also
Create and edit content in a Library
Create and edit units in a Library
Build a Collection in a Library
Search for content in a Library
Use content sidebars to manage content
Add and Delete tags in Library content
Add Library content to a course
Maintenance chart
Review Date |
Working Group Reviewer |
Release |
Test situation |
2025-12-11 |
Product WG |
Ulmo |
Pass |
07/02/2025 |
Leira (Curricu.me) |
Sumac |
Pass |